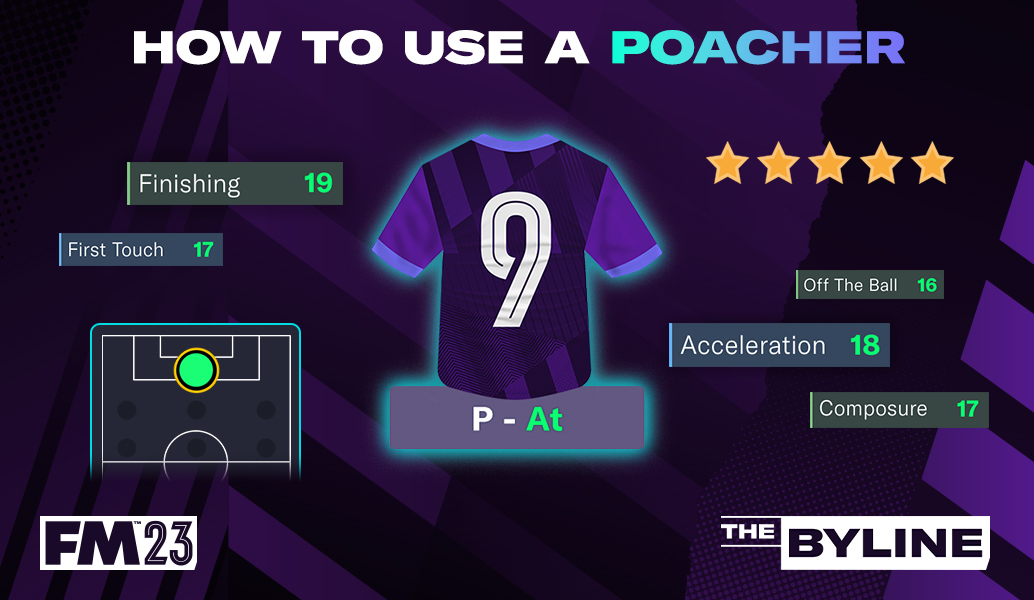
What makes a perfect Poacher in FM23?
With more and more teams working to involve all 11 players on the pitch in their build-up play, the role of the Poacher has diminished somewhat in recent years.
As their Football Manager role description says, the focus of the Poacher is “on scoring goals is so extreme that they rarely offer much help in constructing moves”. They’re there to put the ball in the back of the net and not much else.
However, being a good Poacher requires a very specific skillset and here, Ihor Crusadertsar explores several ways that you can use them to great effect in FM23.
Like with a False Nine, there is no singular formation that will get the best results from the Poacher role. Instead, based on the players you have, there are a few different shapes and role combinations that you can use.
Ultimately, the success of your Poacher is dependent on the service that they get from their teammates. Although the conventional wisdom would be to just fire crosses into the box, they’re a high-risk option because they can be headed clear by tall, imposing opposition defenders or easily intercepted by players possessing strong Anticipation and Positioning Attributes.
More dependable are direct through balls from your playmakers in midfield or quick passes that your Poacher might receive from players near them, such as with a strike partner in a 4-4-2 or an Advanced Playmaker sitting just behind in a 4-2-3-1. Both give more consistent service but do require more technically gifted players to work properly.
In each of the tactical variations I’ve produced with AS Monaco, I’ve outlined the low-risk support players in green, the medium-risk support in orange and the high-risk support players in red.
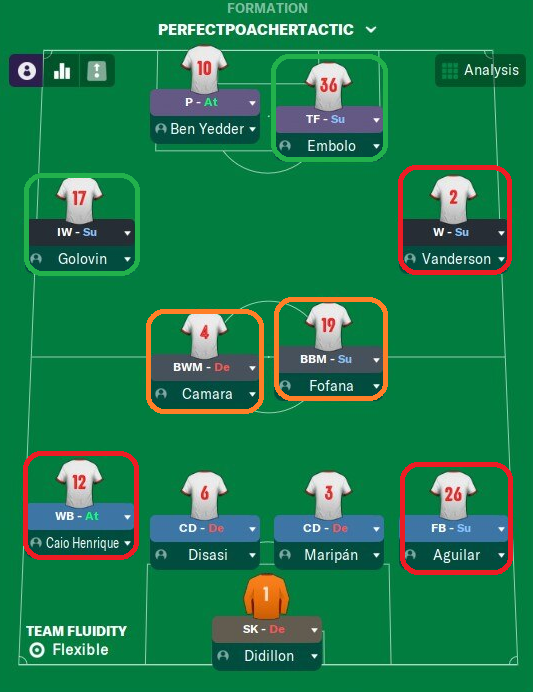
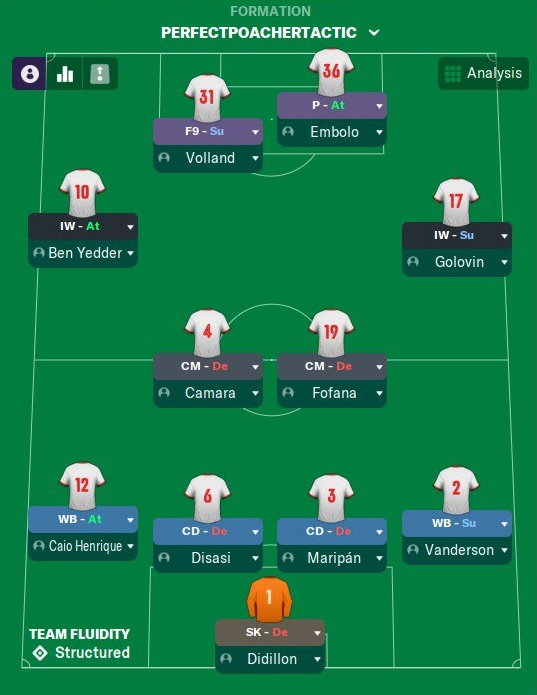
The first example here is a classic ‘Big Man/Little Man’ approach where a physically strong Target Forward is paired up with a smaller, more technical Poacher.
This system ensures a regular supply of chances to the Poacher and one that isn’t solely reliant on crosses or short passes. The best support will naturally come from the Target Forward and Inverted Winger, the latter of which cuts into the space typically occupied by an Advanced Playmaker. Both of these roles will play in close proximity to the Poacher and naturally most of their passes will target him. They are the tactic's "green" service sources.
The physically imposing Target Forward Breel Embolo is perfectly suited to partner up with Wissam Ben Yedder, who is diminutive but a very technical and clinical finisher. Indeed, it's a pairing where both players complement each other's varied skillsets.
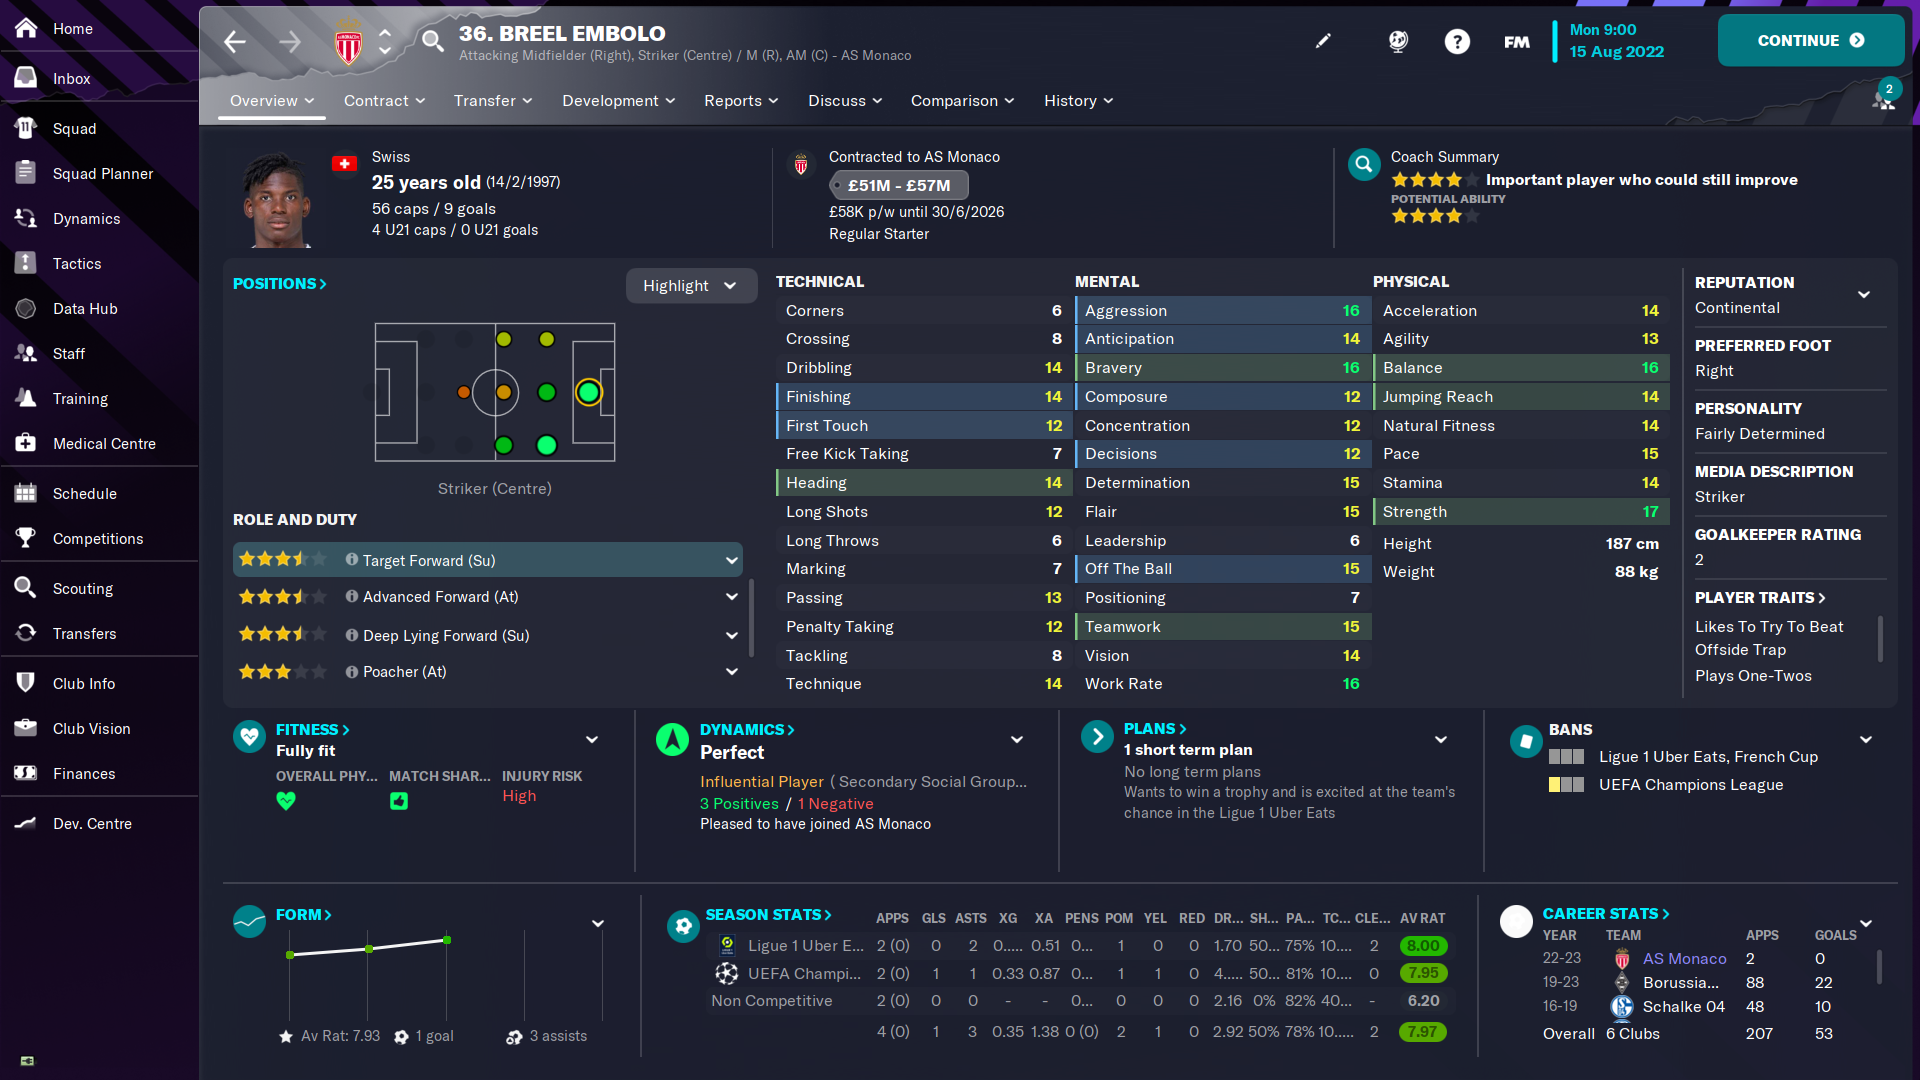
The Winger, Vanderson, on the right, is instructed to aim his crosses towards the near post. This is where the Target Forward, Embolo, will be and with his powerful physique he has more chance of beating the opposition defenders to the ball. Once he’s got it under control, he’ll then be able to assess his options and hopefully create some shooting opportunities for his strike partner.
On the left, I like to think of the Inverted Winger as a hybrid role somewhere between that of a Wide Playmaker and an Inside Forward. Alexandr Golovin is the go-to choice at AS Monaco because he’s both creative and highly mobile.
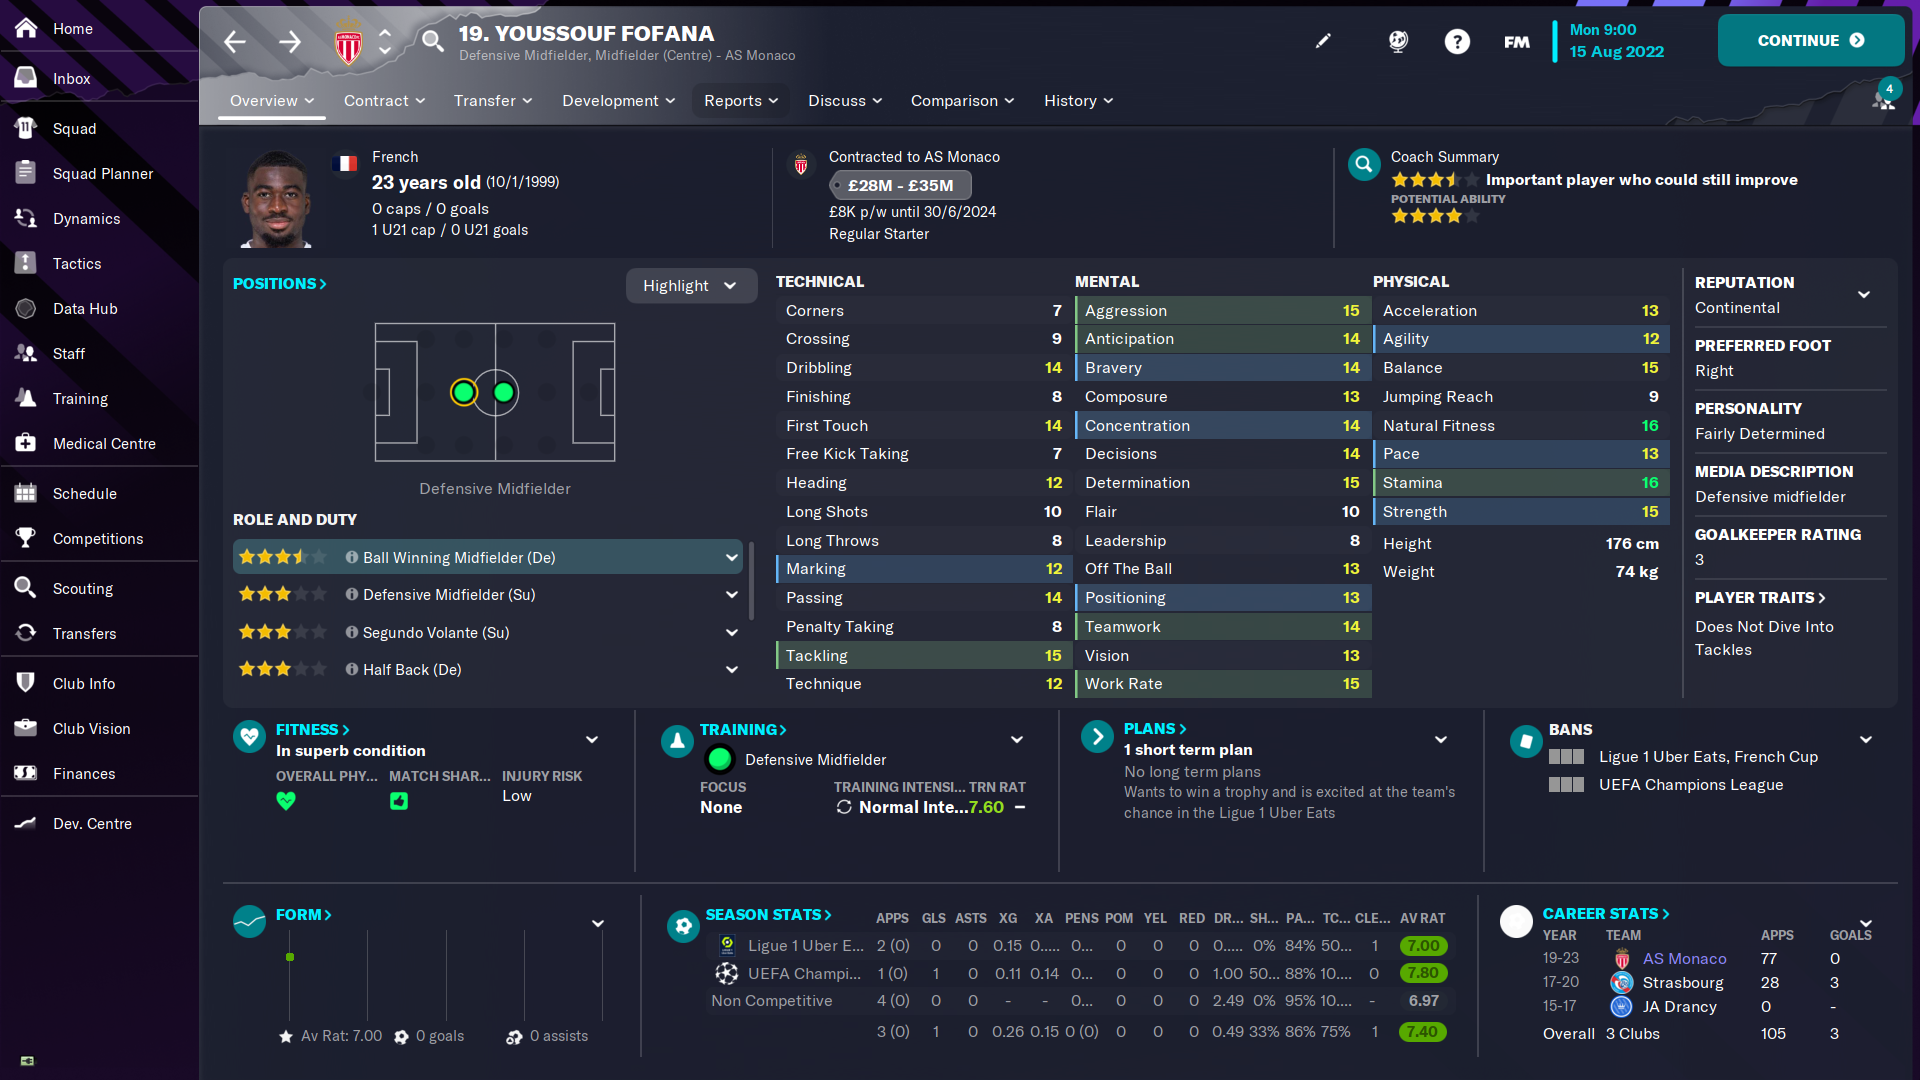
Behind that attacking quartet, you have the two midfielders who will provide the majority of longer passes towards our strikers. In the formation I’ve created here, you’ll see that I’ve gone with a fairly simple combination of a Ball-Winning Midfielder and a Box-to-Box Midfielder.
The Ball-Winning Midfielder isn’t the most comfortable on the ball. So, instead, he puts his pace, strong work ethic and impressive tackling ability to good effect to win the ball back and then quickly lay it off to his midfield partner. Fofana, the Box-to-Box Midfielder, can then provide service to the strikers by either dribbling upfield or releasing the wide players.
You’ll also notice that I’ve chosen contrasting roles for the two wide defenders. The Full-Back on a Support duty will deliver a lot of crosses from a deeper position, while the more dynamic Wing-Back on the other side will push much higher up the pitch and look to cross from the byline where possible.
If you wanted to make this 4-2-4 tactic even more aggressive and creative in the final third, you could change the Target Forward to a False Nine and make the Winger on the right a second Inverted Winger.
Set up like this, the False Nine will retain a central position and look to drop deeper, dragging opposition defenders with them and opening up space for both the Poacher and the two Inverted Wingers. They will also, during the latter stages of attacks, make late runs into the box, providing your wide players with more targets to aim at with their crosses or short passes.
As outlined, the Inverted Winger role is one that offers real versatility and by having two of them in the team, you’ll have two players that will roam around a lot and be very involved in the build-up play. In this approach, I make Wissam Ben Yedder an Inverted Winger on Attack on the left, with Kevin Volland coming into the team as a False Nine.
No matter how good your Poacher might be, they should never be your tactic's only goal-scorer. Even the best players can have a bad day, and this approach with two strikers and two Inverted Wingers balances out the goalscoring responsibilities nicely.
That said, you can still build a really strong and effective tactic around a Poacher in a formation that only boasts one striker, like a 4-3-3.
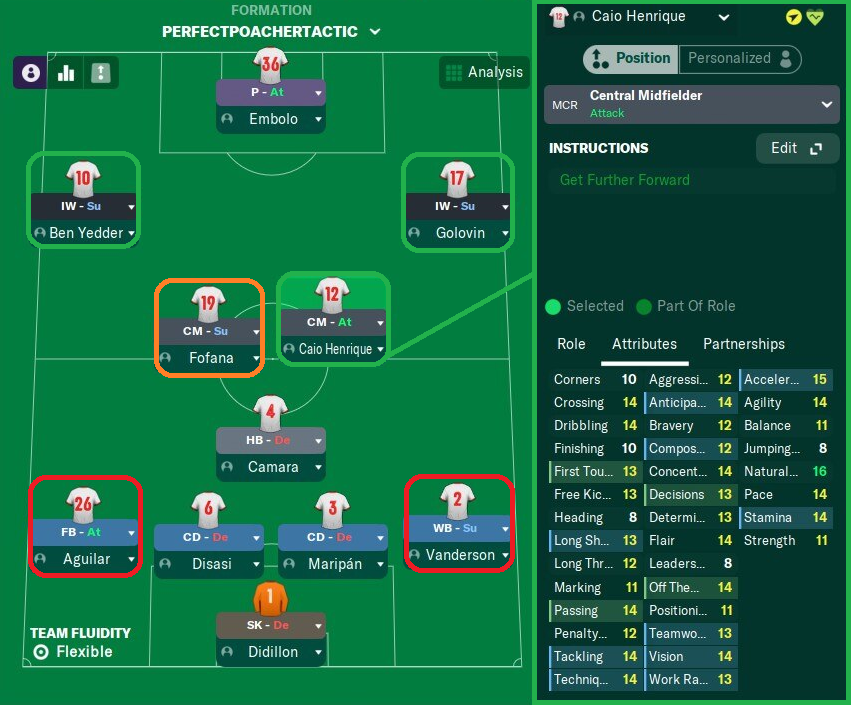
By swapping out the Target Forward for a Defensive Midfielder, you will immediately gain more coverage in the middle of the pitch and make your team more effective on the counter.
As a testament to the flexibility of Monaco's squad, switching a few players around leads to a totally new attacking shape. Embolo, besides being an excellent supporting Target Forward, has all the requisite Attributes for a Poacher. He’s got good Finishing, Anticipation, Off the Ball, Heading and Jumping Reach Attributes and he also possesses the key trait of ‘Likes to Beat Offside Trap’.
In this 4-3-3, you still have two players, namely the two full-backs, set up to provide crosses into the box. The Inverted Wingers on the left and right, meanwhile, will still drift into space and offer more short passes into feet for your Poached to feed off.
With the Defensive Midfielder coming into play, you can also switch the Box-to-Box midfielder into a more outwardly attacking role. In this case, I’ve gone for the Central Midfielder on Attack, who will provide an additional goal threat now that we have one less striker.
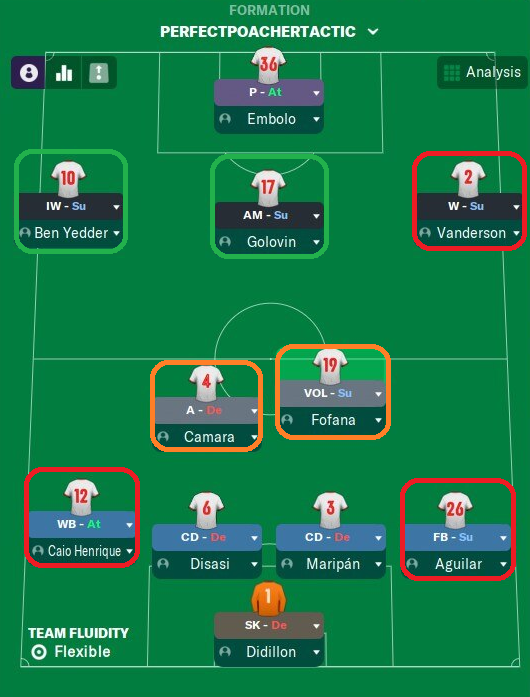
With a few more tweaks, you can also effectively build around your Poacher in a 4-2-3-1.
In this third tactical variation, the idea is to maintain a solid four-man defence at the back, enabling your deeper-lying midfielders to bring the ball up the pitch as quickly and effectively as possible toward the trio of attackers behind the Poacher. This approach results in a pyramidal slow-to-fast build-up strategy with your Poacher positioned as the spearhead of your attacking unit.
Here, the two deeper midfield roles chosen are an Anchor and a Segundo Volante. The Anchor will sit deep and just look to regain and recycle possession, with the Segundo Volante then occupying a freer role that allows them to push and feed passes into either the Attacking Midfielder Golovin or the wide players.
Personally, I like to retain a real sense of balance in all of my tactical approaches. I try to give variety in the service my striker will receive, maximising those that give the best goalscoring chances to my main striker.
As you can see, there are a myriad of tactical variations in which your Poacher can thrive and the formation you ultimately chose should be determined by the strengths of your team.
For example, if you have several excellent crossers and deep-lying playmakers, then your system is probably better suited to the 4-3-3 or 4-2-3-1 showcased here because they will enable you to play on the counter.
Happy managing,
Ihor Crusadertsar